Skip to content
+44 (0)1223 789 720
|
info@cambridgeshoulder.co.uk
Search for:
Home
GTS
Shoulder
Anatomy
The Shoulder
Bones & Joints
Capsule & Ligaments
Tendons & Muscles
Bursa, Nerves & Vessels
Rotator Cuff/Impingement
Rotator Cuff Disease
Impingement / Supraspinatus Tendonitis
Symptoms & Diagnosis
Treatment
Rotator Cuff Tears
Surgery for Rotator Cuff Tears
Partial Thickness Tears
Full Thickness Tears
Massive / Irreperable Tears
Non-Operative Management
Surgical Management
Calcific Tendonitis
Instability/Dislocation
What is Shoulder Instability?
Diagnosis of Shoulder Instability
Treatment of Instability
Anterior Instability
Anterior Instability with Bone Loss
Posterior Instability
Frozen Shoulder
What is a Frozen Shoulder?
Diagnosis of Frozen Shoulder
Treatment for a Frozen Shoulder
SLAP Tears
What is a SLAP Tear?
Diagnosis of SLAP Tears
Treatment of SLAP Tears
AC Joint
Acromioclavicular Jt
Injuries/Dislocation
Diagnosis
Treatment Algorythm
Surgery for ACJ Dislocations
Arthritis
Osteolysis / Weightlifter's Shoulder
Long Head of Biceps
Long Head of Biceps
Symptoms & Diagnosis
Tendonitis Treatment
Non-Operative
Long Head of Biceps Surgery
Rupture of the Long Head
Arthritis
Symptoms & Diagnosis
Non-Operative Treatment
Keyhole Surgery
Shoulder Replacement
Fractures/Broken Bones
Clavicle / Collar Bone Fractures
Humeral Head Fractures
Humeral Shaft Fractures
Scapular Fractures
Scapula Problems
Scapulothoracic Joint
Scapula Dyskinesia
Snapping Scapula
Sternoclavicular Joint
Anatomy
SCJ Conditions
Arthritis
Disc Tears
Instability / Dislocation
Anterior Dislocation
Posterior Dislocation
Patient Information
Imaging
X-Rays
MRI Scans
CT Scans
Ultrasound Scans
Arthroscopic Surgery
Arthroscopic Shoulder Surgery
Arthroscope & Visualisation
Arthroscopic Instruments
Implants
Orthobiologics
Having an Operation
Going to the hospital
Before your surgery
After your Surgery
After your Surgery
Pain relief
Immobilisation
Your wound
Rehabilitation & Exercises
Return to Work
Driving after surgery
Sports & exercise
Follow-Up & Emergency Contact
Consent
Having an Anaesthetic
Anaesthetics
General Anaesthetic
Interscalene Nerve Block
Driving after surgery
Outcome Measures
Physiotherapy
Shoulder Physiotherapy
Types of Shoulder Physiotherapy
Physiotherapy - Instability / Dislocation
Following Surgery
Muscle Patterning / Laxity
Physiotherapy - Rotator Cuff
Impingment / Supraspinatus Tendonits
Rotator Cuff Surgery
Physiotherapy - Deltoid Re-Training
Physiotherapy - Arthritis
Non-Operative Treatment
Shoulder Replacement
Physiotherapy - Frozen Shoulder
Pain Management for Shoulder Problems
Pain Relief
CRPS / RSD
Research & Education
Contact Us
Patient Area
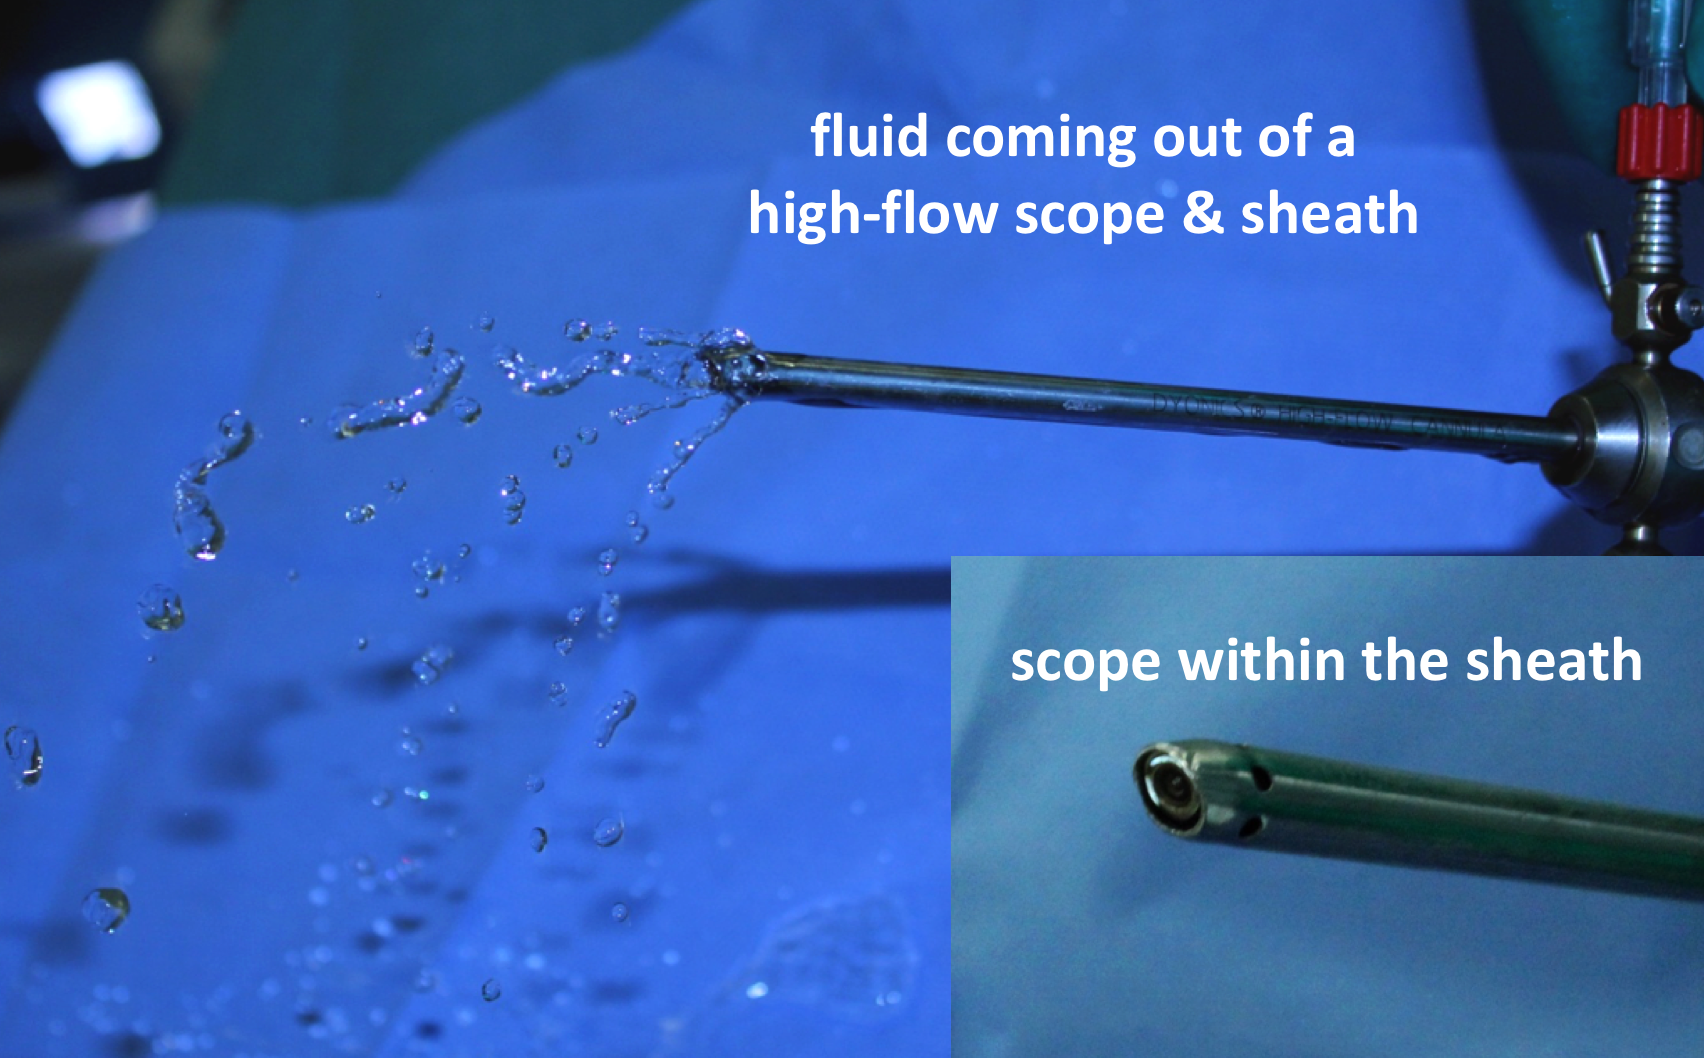
Fig 6. Sheath & Outflow
Request Consultation
Name
Email Address
Phone
Fig 6. Sheath & Outflow
Leave a Reply
Cancel reply
You must be
logged in
to post a comment.